Johan Gustafsson’s
Scripting
Tutorial
2nd edition
Foreword
Welcome to my
second tutorial, the last tutorial I did, focused on basic understanding of the
editor. This time I will focus on the beautiful world of scripting. You don’t
have to print this document since you will be forced to switch between Notepad
and Operation Flashpoint all the time anyway. I assume you know enough
about the editor, using triggers, waypoints and setting up units/groups.
If you have any
questions whatsoever or just would like to send me some feedback don’t hesitate
to email me at goldsword@swipnet.se.
All the scripts
listed in this tutorial have been tested and should work fine, if you
experience problems anyway just email me. In order to answer all the emails I
would appreciate if you only asked questions regarding this tutorial. Not
everything I have written in this file might be valid, if you find anything
that doesn’t speak truth just email me and I will fix it.
Before we start I
would like to thank LustyPooh and Niosop for
their excellent work with the reference guide. I would like to give a BIG thank
you to Jaakko Jokela, Rob Cunningham, Justin Powles, Joakim
Brodin, and Mats
Johansson who have helped me creating this tutorial, thanks a
lot guys! I would also like to thank the staff at AxleOnline for
publishing this, specially Luke Jones Sexton, many
thanks! Lastly I would like to thank you for
reading this and everyone else I forgot to mention.
I’m currently a
member of the axleonline staff so you
alternatively reach me via the forum which I visit daily.
- Johan Gustafsson
aka Goldsword
Legal Notice
© Copyright2001 – 20002, Johan Gustafsson,
All Rights Reserved.
This
document may be freely distributed in any format desired so long as
the
contents are not modified beyond non-obtrusive formatting and you’ve received
permission from all the entitled authors.
Please
note that although I've made a reasonable effort to verify the
material
contained in this tutorial, I make no guarantees. The things written here are as true as I know them to be and
should not be interpreted as anything more.
You
may not use any of the files included in this package for your own economic
gain. All the files are free for the public and should stay that way.
The Codemasters Software Company and Bohemia
Interactive Studio are copyrights/trademarks of their respective owners.
Intro
I
strongly advice you to turn off words auto-spelling, you do this under “Tools”, “Spelling and Grammar” select “Options”
and uncheck the “Check for spelling while typing”. I’m swedish thus using a
swedish version of word so I just translated word by word.
What’s new?
Welcome to the 2nd
edition of the Scripting Tutorial, this version mainly contains typo fixes
since the last version but I also added two new
scripting examples.
Index
1. Setting
up external scripts
2. Getting
started
3. Moving
on
4. Advancing
5. Camera
scripting
6. Examples
Please report any error you may find so I can fix them
for future versions! I would also like you to email me and tell me what you
would like to be included in the next version.
Setting up external scripts
The first chapter
will show you how to run your scripts from the editor and where to put them. If
you already know how to implement scripts for your missions you may skip this
entire chapter.
What is a script?
Some of you have
never dealt with scripts before and perhaps wonder what a script really is. If
you are one of those guys be sure you understand this, if you already know what
a script is you can just skip this section. A script is an external file, just
like a music track, which is written in a certain language, which the game
engine can understand. A script really is like a blueprint, it will tell the
engine to do a specific task with an object at a specific time. Objects in
operation flashpoint can be anything from a weapon to a tank. When I refer to
any object I mainly talk about soldiers (units) or vehicles. So in big terms a
script is a message containing information for the game.
Why should I use
scripts when the editor lets me use triggers and waypoints?
Hey, think a
little. What really does the editor let you do? Can you tell the editor to make
a unit sit? Can you tell the editor to make a unit die? Can you tell the editor
to make a unit go kill another specific unit? Can you tell the editor you want
a RPG instead of a puny M16? Ok, some of you might say something like. “Hell
yeah, I just type in some code in the init fields or activation fields.” That’s
true, but the things you type is actually small scripts! However there are some
things that require you to use external scripting, and some scripts can get
quite large which makes it hard to deal with these in the editor. Another
drawback is the fact that you must rewrite every time (or copy/paste). It is
here the external scripting comes in handy. I prefer external scripts rather
then 5 lines of code in the init/activation fields. You also cut the amount of
triggers in your map that I think is a good thing.
Maybe I could try
scripting a little then, but how do I load an external script in the editor?
In order to get
your scripts available for the editor you must put them in the same directory
as the mission you are currently making. Say you have a script called killme.sqs
and the mission you are currently making is called ambush. Simply
put the script in the same directory as the mission file (mission.sqm)
in this case the mission file is located in the ambush.cain since you
are making a Kolgujev mission. If it had been an Everon mission the name would
have been ambush.eden and a Malden mission would be located in the ambush.abel
subdirectory. Note that these directories will end up under users/<name>/missions/
where <name> is your name. If you summarize this it would go something
like this.
1. Make
the script. (I prefer using notepad)
2. Save
the script in your mission directory
|
Mission name |
Eden |
Malden |
Kolgujev |
Destert Island |
|
Inprison |
Inprison.Eden |
Inprison.Abel |
Inprison.Cain |
Inprison.Intro |
|
Ambush |
Ambush.Eden |
Ambush.Abel |
Ambush.Cain |
Ambush.Intro |
|
Test |
test.Eden |
test.Abel |
test.Cain |
test.Intro |
|
Stalker |
Stalker.Eden |
Stalker.Abel |
Stalker.Cain |
Stalker.Intro |
*Here is a small
table over the directory names for the different islands. To the left is the
name of the mission, the grey cells shows the name your mission directory will
get.
That’s
easy, how do I run my script?
This can be
a little harder. Since you will make different scripts you can’t use the same
syntax. Some scripts will not take any values or objects (I will explain later)
while others will take multiples. The basic syntax however goes like this.
[arg1, arg2, argX] exec “scriptname.sqs”
This will
send the arg1, arg2 and argX to the script called scriptname.sqs. The
args can be an object, a value, a string or even an argument such as not(alive
ap) which will send the value 1 or 0 to the script (true or false). I will
explain everything later when we get to Passing values and objects to
scripts. The keyword I want you to learn however is the exec
keyword, which is short for, execute. You should use the init and activation
fields when executing your scripts.
What
exactly are the .sqs and .sqm files?
Any script
you will make has to be a .sqs file. The mission file however will be
named .sqm. Do not confuse these similar names. A rule of thumb is:
Script
starts with a s and a script file ends with a s. .sq(s)
Mission
starts with a m and a mission file ends with a m. .sq(m)
Getting
started
In this chapter we will learn how to write small
basic scripts also taking a look at some basic keywords and commands. We will
learn how to call different types of scripts from the editor. I highly
recommend you to write all the scripts yourself and not to use the ones I gave
you since it will be easier to learn this way.
Your
first script!
We will
begin by creating a small script named hello.sqs; the script will not
take any values or objects. It will simply print a message on the screen
saying: “Hello!”
Open
notepad and write the following. (Please do not cut & paste, since you will
learn better when writing yourself, trust me on this one)
Hello.sqs
; My first script will show a message for the
user.
; Say Hello!
TitleText [“Hello!”, ”plain down”]
; Exit
Exit
That’s it!
The first you should learn is the ;. This symbol will let you print
remarks and notes. This will only work when the ; is placed in the
beginning of a line. Everything after the symbol will be ignored. It is a good
scripting practice putting remarks since it will make the code much easier to
understand for others. If you write really big scripts it is also a good thing
to add divide mark. However, when you put the ; after a command, such as
the TitleText [“Hello!”,”plain down”] you will tell the reader (the part
of the game engine which reads the script) that you would like to begin a new
command. So the following code would produce the exact same result.
; My first script will show a message for the
user.
; Say hello and exit
TitleText
[“Hello!”,”plain down”];exit
The reader will not complain about uppercase
and lowercase, so you could write the command TitleText as TiTLeTExt. This
doesn’t look good though and is very hard to read so stick with the TitleText,
or titleText versions. This rule also applies to variable names and strings. I
often put an uppercase character for each word in the keyword and stick with
lowercase for my variables. Now lets take a look at the TitleText keyword; this
is a keyword that will print text on different parts of the screen supplied by
the last statement “plain down”. I strongly recommend you to have Lustypooh’s
and Niosop’s editing reference at hand when reading this tutorial since I won’t
explain all the different commands you can give the keywords. “plain down”
However will make the text appear at the lower portion of the screen.
Ok, now the script is done and ready to be
executed. Start up ofp, select any of the islands and put down a single unit,
this should be the player. Now in the init field type:
[] exec “hello.sqs”
Before you
try the mission don’t forget to put the script file in the same directory! Save
the game and look up the mission directory. Put the hello.sqs file here
and return to the editor. Now press Preview, cool huh! Well not exactly, but it
is your first script and you should be proud about it. The same effect could be achieved by using
the Effects options under triggers. It is not a good practice putting
this kind of script under an unit. It is much better if you create a trigger
and set the condition to true, and then type the same code in the activation
field. Now lets discuss the code we wrote. Note the [] which is used for
vectors (arrays) here I left it blank which tells the reader that the script
doesn’t take any arguments. You could have placed nearly anything here since
the script won’t do anything with that anyway. However this would require more
code and make the mission harder to understand. The exec keyword will
tell the reader to execute our script hello.sqs.
Passing strings to a script
A script
that doesn’t take anything doesn’t really make you that horny (or does it?). So
let’s add some code to the script that will enable the user to control what to
print.
Print.sqs
; A script that will print a string
; Get the message to print
_msg = _this select 0
; print it!
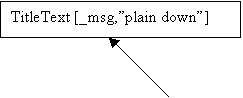
TitleText [_msg,"plain down"]
exit
Okay, first
we will take a look at the _msg = _this select 0 line. _msg is
our variable which is and must be a string since the TitleText keyword only
handles strings (There is a way to get around this which we will learn later)
It will be created as soon as the reader detects it for the first time. The _
is a way to tell the reader that the variable we whish to create should be a
local one. A local variable is only visible within the scope where it got
declared. In this case the whole script is the scope. If you didn’t had the _
sign before the variable name it would be created as a global variable, which
makes it visible for the entire game. The name msg is just a name I
choose, you could have named it message or even dgshjdhk but that
would not make life easier for you or the ones reading your scripts later on.
The keyword _this is a special one. It contains the object, which you
are currently dealing with in this case the vector, which we will pass to the
script later on. When you create a trigger the this keyword refers to the
trigger’s condition. The select keyword is really useful. It will
retrieve a certain value or object from an array. When the reader reads the
execute line it will create a vector containing all the arguments and send it
to the script. The number after the select keyword will tell the reader which
element in the array to fetch. I made an illustration of the _msg = _this
select 0 line below. The other new thing we wrote is _msg instead of “Hello!”
within the TitleText command. Since _msg should contain a string this will make
the TitleText print the contents of _msg. If msg contained a number this
wouldn’t work since TitleText expects a string. Also note that if you stuck
with the “ signs and printed TitleText [“_msg”,”plain down] you would
get quite angry when the script would print
“_msg “
instead of the contents of the _msg string. If you are new to this kind of
stuff you might get really confused. Don’t worry though; you will understand
more and more the more scripts we write.
From here on I will not tell you to put the script files into the mission directory you will have to do that yourself.
Now switch
back to ofp by using the alt + tab command and open up the player unit
options. Locate the init field and change the line to.
[“Hello,
I’m so Cool!”] exec “print.sqs”
Now save
and run! Wasn’t that just great? Try changing the command to
[100] exec
“print.sqs”
That would
result in an error, look in the top left portion of your screen and note what
is says. It should say something like expected string. Remember the
thing that I said earlier about Titletext only working with strings? This is
the reason why we can’t print numbers. I will teach you a way around this later
on though. Meanwhile try studying this little flow chart I made.
[“Hello,
I’m so Cool!”] exec “print.sqs”

Send
the contents of _msg to the function Titletext. _msg =
“Hello, I’m so Cool!” _msg =
_this select 0
Moving
on
Here comes the funny part, in this chapter we will
be focusing on scripts that won’t close until a certain thing has happened. We
will take a look at passing objects to scripts, creating loops and checking
values.
Passing an object to a script
Passing
objects to a script works exactly the same way as passing strings instead of
passing a string though you simply type in the name of the object you wish to
pass. If you would like to pass a value you just type in that value. Take a
look at this script and it will become clear.
Objpass.sqs
; Sample of passing an object to a script
; Get the object
_obj = _this select 0
; Make the unit do a push up
_obj SwitchMove “FXStandDip”
exit
This script
will take one object, a soldier since I’m using the SwitchMove command. SwitchMove
by the way is a keyword that will play different animations or set different
poses. Notice the _obj = _this select 0. It’s exactly the same line used
when getting a string. How does the reader know it’s a string or not then? When
you pass a string you use the quote (“) sign, when passing an object you
use the object name. Lets test the script by creating a map where the player is
close enough to another soldier. Name the soldier guy and use the
following code to invoke the script.
[guy] exec “objpass.sqs”
This will
pass the object named guy to the script, here he will get a new name, which is
_obj. There is only one guy though, but there may be many _obj objects
since they are local. Another good thing about passing objects in the init
field is the fact that you can use the this keyword. Since this in this
case (hehe) points to the guy named guy (Stop! ok) the following code would
work fine. Actually it’s better, this way you don’t have to name the unit and
you can use paste if you wanted to run the script for another soldier.
[this] exec “objpass.sqs”
Passing
objects to a script is really easy and you should not have any problems with
it. One thing to keep in mind though is naming the objects and strings in the
script in a way that will help you remember what is an object and what is not
an object. I often start object names with an uppercase letter (no need in
names like _object and _obj) and only use lowercase for strings and variables.
In time you will develop your own script style.
Multiple argument passing and loops
Now lets
continue by creating our first script that won’t exit right away. The script we
will create us quite fun. The script will blow up a certain vehicle whenever a
unit gets into it. The script must therefore take two objects, the unit and the
vehicle. It most also stay active until the unit gets into the vehicle and then
destroy it. Take a look at this.
Blowup.sqs
; A small script that will blow up a vehicle as
soon as a specific unit gets into it
; Get the unit that will be affected
_Unit = _this select 0
; Get the vehicle that will be affected
_Vehicle = _this select 1
; Main loop
#Update
; Check if the unit is in the vehicle
? (_Unit in _Vehicle) : goto "BlowUp"
; Wait 2 seconds
~2
goto "Update"
; The unit must be in the vehicle
#BlowUp
; Destroy the vehicle
_Vehicle setdammage 1
exit
Ok, where
do I start? A good place would be explaining the top lines. So far you have
only seen how to get one object or value, but here I get two. _Unit gets to be
the first element in the passed array and _Vehicle gets to be the second. Like
in most programming languages you start to count at 0. Next comes a new thingy:
#Update this is a so-called Label, if you are an ASM programmer
or a Basic freak you probably already knows about these (we c++ dudes never use
this kind of ugly code, right?) A label is like a tag you assign a specific
line in your script. This way you can jump to this spot whenever you would like
to, by using the goto keyword. Note that the label is defined by a #
and no quotes while the goto demands you to put the label’s name in quotes and
cut the #. The good thing about this is you can repeat code. In this
case we jump between the #Update and goto “Update” lines, until the unit steps
into the vehicle. The line ? (_Unit in _Vehicle) : goto “BlowUp” is a little
more advanced. The basic syntax is.
? Condition : On Activation
The ? works
just like the word if and checks weather a condition is true or not. If
it is true the code after the : will be executed. The in keyword
has nothing to do with the two operators ? : instead it will check weather a
unit is in a vehicle (or in a vector). In this case we check if the object
named _Unit is in the object named _Vehicle. I put the condition in parentheses
since this makes the code easier to read. So this line will make the line goto
“BlowUp” execute first and only when the condition (_Unit in _Vehicle) return
true. You could invert this by using the ! operator. It works exactly
like the English word NOT and will invert the condition. This would not
be any good here since we want the car to blow-up when the unit is within it,
not when it isn’t. Anyway here is what you should have typed if you wanted to
execute the goto “BlowUp” line whenever the unit wasn’t in the car.
? !(_Unit in _Vehicle) : goto “BlowUp”
In order to
check values you must also learn the different check operators. Take a look at
the following table.
Operator |
== equal to |
!= not equal to |
> greater then |
>= greater or equal to |
< lesser then |
=< lesser or equal to |
Test |
A == B |
A != B |
A > B |
A => B |
A < B |
A <= B |
|
If a > b |
False |
True |
True |
True |
False |
False |
|
If b > a |
False |
True |
False |
False |
True |
True |
|
If a = b |
True |
False |
False |
True |
False |
True |
|
Invert = |
A =! B |
A == B |
A <= B |
A < B |
A >= B |
A > B |
* The blue text will be the value the check
will return.
You may
also use logical operators such as and and or. If you like
English the keyword is and for and, and or for or (Didn’t I say
stop it?) Other peoples such as C++/C dudes might as well use the cooler
looking && and || operators. Where &&
stands for and, and || stands for or. Using logical operators should be
second nature because they will give you the possibility to do some really
complex stuff. Next up is the ~2 line. This will simply wait 2 seconds
before continuing with the script. This is really important since if we didn’t
have this then the script would get stuck in an infinitive loop and never let
the control over to the game engine. The last new thing for us is the setdammage
command, which is really easy to handle. It will set the health (armour) for a
specific soldier or vehicle. In this case it will set damage level 1 to the _Vehicle
object. Since the range for damage is 0 – 1 where 1 being dead and 0 being not
taken a scratch the _Vehicle will get destroyed.
When
testing the script first create your map and put down a player, name it ap.
Next create a M1A1 (good explosion) as an empty object close to the player. In
the init field for the tank put the code.
[ap, this] exec “blowup.sqs”
Play the
map and have fun!
Scripting Challenges
Create a script called carbomb.sqs which will take two values.
First the unit which must get into the vehicle and second the vehicle which
will be equipped with a bomb. The script should detect weather anybody is in
the car and if the car has a speed greater then 5 (> 5). When it does it
should be a 5 second delay before the car (or tank) blows-up.
Hint: Use the logical and operator (&& or and)
together with the in and speed keyword. The speed keyword has the
following syntax and will return the current speed for a vehicle. The speed is
in km/h.
speed _object
Advancing
This chapter will teach you have to call other
scripts from another script. This way you can chain different script, I will
also show you a way to use vectors as argument passing. It will also cover some
new keywords such as format that will let you show variables!
Chaining scripts
Sometimes you might want a script to kick in
when another script is done, this is very easy to implement since you can use
the exec keyword in scripts as well. I will show you an example.
The script is called countdown.sqs and
will show a countdown timer. When the timer reaches zero it will call another
script that takes no parameters.
Countdown.sqs
; Get the different passed data
_timeleft = _this select 0
_caption = _this select 1
_location = _this select 2
_script = _this select 3
#Update
; Wait 1 second
~1
; Decrease the timer
_timeleft = _timeleft - 1
; Check whether the time is 0
? (_timeleft == 0) : goto "Done"
; Show the time left
TitleText [format [_caption + " %1",
_timeleft], _location]
goto "Update"
#Done
; Execute the script
[] exec _script
exit
The main
part I want you to focus on is the second last line and the TitleText line. The
TitleText command looks really awful and is quite messy, this is because of the
other keyword in it which name is format. This is a really important
keyword that will let you to convert variables (numbers) to strings (text). The
syntax is as follows.
Format [“Text %1 %2 %X”, var1, var2, varX]
Where
“Text” can be a normal string, inside it you can put %x (x = a number)
which means it will convert the x’th variable defined to a string and show it.
You put the variable you want to show after the string. So if you would like to
show a variable named _test you could do like this.
Titletext [Format [“Test is: %1”, _test],”plain down”]
Note - you
put the %x within the quotes. Format doesn’t print anything itself instead it
returns the complete string. In this case the keyword TitleText uses it for
showing “Test is: 5” if _test had the value of 5. This is really good when
making multiplayer levels and you want to show scores or something like that.
Another thing is the _location string we use instead of the “plain down”
this will let the user decide where to put the text by sending for instance
“plain” or “plain down” as the argument.
The line []
exec _script will execute the script named _script, which was passed by the
user and stored into the string _script. In order to test our script we must
use a script that does not take anything. Do we have one? Yes the hello.sqs
will be perfect.
Create a
new map, place the player and add the following code in the init field.
[10, “Time Left:”, “plain”, “hello.sqs”] exec “countdown.sqs”
Test the
mission, you should see a countdown, starting from 10 (you will only see 9 to 1
though) and counting down to 0. When it reaches 0 the text “Hello!” should be
displayed.
Passing parameters in chains
What if we
needed to call another script, maybe one that takes parameters? This could be
achieved by passing a vector with the first script. Take a look at this and you
will see what I mean.
Chain.sqs
_script = _this select 0
_vektor = _this select 1
~2
TitleText ["Look!", "Plain
Down"]
~2
; Get the number of elements in the vektor
_elements = count _vektor
; Print how many arguments you passed
TitleText [Format["You passed: %1 arguments.",
_elements],"Plain Down"]
~3
; Passing the show over to the script, also
passing arguments!
_vektor exec _script
exit
This script
will use a new keyword, and that is the count keyword that will return
the number of elements within an array. Here we assign it to the variable _elements
that we use to show the user how many elements he passed (Just for fun sake).
The neat part about this script however is the last line before the exit _vector
exec _script. This will pass the whole vector to the script. Since the
vector will contain something like [“This is just a test”, 100] and the _script
will contain a string like “test.sqs” the reader will read the following.
[“This is
just a test”, 100] exec “test.sqs”
Which is
perfectly legal. This way you can chain every script you got with another, not
mattering weather the script wants 6 arguments or none at all. We can test this
by creating a mission. Plot your player and add the following in the init
field.
[“countdown.sqs”,[10,”Time Left:”, ”plain”, ”hello.sqs”]] exec
“chain.sqs”
It looks
kinda complex but the additional []’s
is just another array we pass, perfectly safe since the chain script wants
a vector as its second argument. The fact that the vector looks exactly like a
call to the countdown script makes things even better. Remember that the
countdown script also takes a script that it will run when done? Well, here I
choose to run the hello script again. When you test the level it should first
execute the chain script that will print “Look!” and then execute the countdown.sqs
file which we created earlier. The chain script then passes the entire array to
countdown, which uses this as its arguments and countdown from 10. When done it
will use the last element in the vector we passed to execute the script named hello.sqs.
This script will print “Hello!”. If you don’t really understand the logic about
this don’t worry, try experimenting with the chain script. Testing it with
different scripts we’ve done, sooner or later you will say “Aha!” and you will
start making your own chaining scripts.
Scripting
Challenges
Implement a
chain handler for the countdown script. Name the new countdown to countdown2.sqs.
It should work exactly like the old countdown but that supports chained scripts
with arguments like the chain.sqs. So when you call the countdown2
script you should be able to do the following.
[10,”Time Left To Say Hello:”, ”plain”, ”hello.sqs”,[]] exec
“countdown2.sqs”
or
[10,”Time Left:”, ”plain”,
”countdown.sqs”,[10,”Yupp:”,”plain”,”hello.sqs”]] exec “countdown2.sqs”
Camera
scripting
In this chapter we will learn how to use the camera
in Operation flashpoint. The chapter will show us how to initialise and use our
own cameras. It does also contain many examples on how to use the camera for
creating small scripted scenes.
The camera
Operation
flashpoint took a route I think was great, instead of using 100 mb AVI films
they choose to use the powerful scripting language for the movies. This is
probably together with the ai-voice engine the reason why the game fitted into
1 cd! Making cut scenes is where scripting comes in handy. You get total
control over the camera and can do whatever you like. Before we rush ahead and
start create our own cut scenes we must first learn the different camera
commands. I will start with the most important ones. The script I will
demonstrate this on is called fcam.sqs and will create a camera that
will look at the player.
Fcam.sqs
_Object = _this select 0
_camx = getpos _Object select 0
_camy = getpos _Object select 1
_camz = getpos _Object select 2
; Create a camera and place it 5 meters from
the object 1 meter above the ground
_cam = "camera" CamCreate
[_camx,_camy+5,_camz+1]
; Point the camera to the passed object
_cam CamSetTarget _Object
; Set an effect for the camera
_cam CameraEffect
["Internal","Back"]
; Apply the changes!
_cam CamCommit 0
~10
_cam CameraEffect
["Terminate","Back"]
CamDestroy _cam
Exit
As you can
see there are many new keywords and commands to learn from this script. We will
begin with the first, CamCreate. CamCreate works in a quite strange way,
it will take 3 numbers in a vector and a string. The string must be written
before the command and should contain either Camera or Seagull.
The string will tell the CamCreate function which camera type to create.
“Camera” will tell CamCreate to create a normal camera, if you use “Seagull” it
will create a bird type of camera, which I won’t take up in this tutorial. The
vector you supply after the command must contain the x,y and z coordinates for
the camera. Here I really mean the camera and not where it will point. In this
script I used the coordinates for the passed object. We will take a look at the
GetPos command later. I also used a little bit of algebra to set the
camera 5 meters away from the player. Remember that y is the vertical
coordinate (North and South) thus the camera will be placed 5 meters to the
north of the object. I also added 1 to the z coordinate so the camera won’t be
placed on the ground. Lastly I created a new local object named _cam
which will be our camera object, you could think of this as our new NIKON F5
(a camera).
Maybe we
should take a look at the GetPos keyword before you starting to get all
crazy. GetPos will simply return a vector containing the x,y and z coordinates
for an object. Here we used it to get the coordinates for the passed object
which we named _object. We stored each one into a variable which we then used
to set the cameras position. Since it will return a vector we used the select
keyword to get the element we wanted. A very useful command which you will use
daily.
Lets get
back to the camera keywords, next up is the CamSetTarget keyword which
comes in two versions. The one we used took an object as the argument, when we
pass objects to the CamSetTarget function it will automatically locate the x,y
and z coordinates for the object. If this wasn’t enough it will also update the
values if the object moves! The other version will take a vector containing x,y
and z coordinates for a spot. (Yes you could use the variables we created
earlier since they would point to our object.) What does CamSetTarget do with
the coordinates then? It will automatically point the camera to these
coordinates, it will not move the camera if something is in the way so don’t
expect too much.
Next up is
the CameraEffect command which I don’t really know that much about. The
only arguments which seems to work are “Internal” and “Terminate”. I think
Internal will place the view-port inside the camera (as we would like) but I’m
not sure. Terminate will delete the effect and hand over the camera control to
the player. The second argument we pass is the position of the camera relative
to our target. However this doesn’t seem to do very much if the camera got a
target. I think the CameraEffect function is quite useless when you are
scripting your own movies, in the editor it works fine though. The bad thing is
we cant delete this, it is essential for our script to work at all. Just place
the _CameraName CameraEffect [“Internal”, “Back”] every time you whish to do
something with the camera (BIs did it).
CamCommit we simply apply all the changes we
have done to the camera, if we didn’t use this nothing would have happened.
Remember this, when you change something with the camera, position, target or
whatever you must use the CamCommit keyword. There is one exception though
which has to do with the CamSetTarget funtion. When we pass an object to the
CamSetTarget function it will automatically keep track of the position of it and
thus change the location of the cameras focus. So we don’t have to call
CamCommit as soon as an object has moved. The number specified after CamCommit
is the delay in seconds before the camera moves into position. Zero will make
an immediate jump.
One last
thing about the CameraEffect, you might noticed that we used “Terminate” at the
bottom lines, this will tell the reader to terminate the current camera and
return the control back to the player camera. It will not delete the
camera object though, so we could use the _cam CameraEffect [“Internal”,”Back”]
after the termination to bring the control back to our camera (we must also use
a CamComitt though).
The last
keyword is the CamDestroy which will simply destroy our camera object.
This keyword makes my head go crazy because I can still use the camera
afterwards. I thought It would destroy the camera. Probably it has something to
do with returning memory, but why can we use the camera afterwards then? And
shouldn’t a local variable get destroyed when the scope ends? If it’s a class
shouldn’t a de-constructor kick in? If you have the answer please email me so I
could fix this. Anyway, it is better to call this function since they created
it, it must do something right?
So, lets
test our script. Create your player and put this line in the init field.
[this] exec “fcam.sqs”
You should
now see your player from a good 5 meters away. If you like to script cut scenes
please stay tuned for their will be more to come!
Another camera script
Lets
continue our journey in the beautiful scripting language with a script that
actually does something fancy. The script we will create will introduce to you
some new keywords which might be good to know when dealing with cameras. The
script will simulate a recon soldier that spots a soldier. The soldier is of
the friendly type and will start to make some pushups when the player spots
him. (Of course you can use an enemy soldier) The script is fairly large but
nothing compared to what real cut scene scripts would be.
Camera.sqs
_CameraMan = _this select 0
_Actor = _this select 1
; Get the Cameraman's postions
_CameraPos = getpos _CameraMan
_cmx = _CameraPos select 0
_cmy = _CameraPos select 1
_cmz = _CameraPos select 2
; Set the camera at the Cameraman
_cam = "camera" CamCreate
[_cmx,_cmy,_cmz+2]
; Point the camera to a unit
_cam CamSetTarget _Actor
_cam CameraEffect
["Internal","Back"]
; Set the active camera
_cam CamCommit 0
@CamCommitted _cam
; Add Binocular view
CutRSC ["Binocular","Plain
Down",100]
_Zoom = 0.7
#ZoomIn
; Zoom in
_zoom = _zoom - 0.01
; Set the Field of view
_cam CamSetFov _zoom
; Apply changes
_cam CamCommit 0
~0.01
? _zoom < 0.1 : goto "ZoomOutWait"
goto "ZoomIn"
#ZoomOutWait
; Force the unit to do a pushup!
_Actor PlayMove "FXStandDip"
~8
#ZoomOut
; Zoom out
_zoom = _zoom + 0.01
_cam CamSetFov _zoom
_cam CamCommit 0
~0.01
? _zoom > 0.7 : goto "Done"
goto "ZoomOut"
#Done
~2
; Give the control back to the player, and
remove the binocular view
CutRSC ["Default","Plain
Down",100]
_cam CameraEffect ["Terminate","Back"]
CamDestroy _cam
Exit
Ok, before
I explain what the script does and how it does please go a head and run the
script. Place your player somewhere on the map, name him ap. Place another
Western soldier somewhere else within the line of sight of the player. It can
be a good distance between the two though. In the init field of the other
soldier add.
[ap, this] exec “camera.sqs”
Did you
like what you saw? If you didn’t I’m sorry I couldn’t make a funnier script.
Now, I will
start explaining what the script will do in regular terms. When you call the
script it will take two parameters, one being an object acting as a camera man
(Location for the camera) the other being the target which the camera will
point to. The script will then set up a camera and make it point to the
soldier, it will then start zooming a little in on the soldier which starts to
do a pushup. (Here you could have used the objpass.sqs, passing the _Actor)
When the
zoom in is done the script will zoom out and exit. Now lets explain how it is
done.
Firstly you
might notice a slight change I made when fetching the position of the camera
man. Here I created a vector called CameraPos, since the GetPos keyword
will return a vector the CameraPos vector will get the current positions of the
camera man. Then when I fetch the x,y and z values for the camera man I use the
vector instead of the GetPos function. This way I can do the same thing a
little faster since I don’t have to use that many function calls to GetPos.
Here I use 1 instead of 3.
Next is the
@CamCommitted keyword which might be new to you. The keyword is actually
just CamCommitted and will return true or false depending on the status
of the camera. If the camera is ready (in place) it will return true otherwise
false. Since I used CamCommit 0 it will return true directly since their will
be no delay. The @ (at sign) will make the script wait until the
CamCommitted function return true. So @ works exactly in the same manner as ~
except it will check for a condition rather then keeping track of some time.
Here I used it only for show. You can use @ with any other boolean function
such as in,alive or regular checks like _adam == _eve. A
handy little thing it is.
Now comes
the part where I set the screen to look as using binoculars. This is achieved
by using the CutRSC (Cut Resource) keyword. I send to it the Resource I
would like to use. In this case “Binocular”. The other thing I send with it
isn’t really used here since I use a
resource. If you just passed a string, however the next argument will decide
where to write the text. I have no clue what the last argument does. Just give
it a 100 and it will be happy (Bis did it).
Next I
create a local variable which I give the name _zoom. This will be used
later on when we zoom the view.
The label
called “ZoomIn” works as a for loop, it will do three basic things.
First it will decrease the _zoom variable with 0.01 which gives a smooth zoom.
Second it will check weather _zoom has reached the lower limit 0.1, if it has
it will exit the loop. Lastly it will update the camera, it will only update
the camera after we apply the zooming using the CamSetFov (Field of
view) keyword. CamSetFov will take 1 parameter, the FOV value or zoom value to
use. I think the range is 0 - >1. Where a value less then 1 will zoom in and
higher will zoom out. The regular FOV for a soldier is 0.7, that’s why we gave
that value when we created the _zoom variable. When the ZoomIn loops ends the
script will pause for 8 seconds and tell the _Actor to do a pushup. Then it
will enter the “ZoomOut” loop which will do the opposite of the “ZoomIn” loop.
At the end
of the script we will set the view-port back to normal by passing “Default” to
the CutRSC function. It will also Terminate the camera so the control goes back
to the player.
Another script
Before we
move on with this tutorial I will show you one last cut scene script. This
script will show a soldier speaking in Russian. The thing he will say is not
important, actually I just took some random sounds from the stringtable. So if
you understand Russian this script will probably show you some quite weird and
funny results. Anyway, the script will require you to pass two objects. The
first being the unit that will do the talking the other will be the camera. The
script will demonstrate three new keywords, SetMimic, say and CutObj.
Here is the script.
Cutscene.sqs
_CameraObj = _this select 0
_Actor = _this select 1
_CamPos = GetPos _CameraObj
_cx = _CamPos select 0
_cy = _CamPos select 1
_cz = _CamPos select 2
; Makes the screen look like a tv
CutObj ["TvSet","Plain
Down",100]
; Initialize our camera
_Camera = "Camera" CamCreate
[_cx,_cy,_cz+1.25]
_Camera CamSetTarget _Actor
_Camera CameraEffect
["Internal","Back"]
_Camera CamCommit 0
@CamCommitted _Camera
; The lines below will make the actor talk and
change his face expression
_Actor PlayMove "StandStraight"
_Actor SetMimic "Happy"
_Actor Say "RUS2"
~2
_Actor Say "RUS7"
_Actor SetMimic "Angry"
~3
_Actor Say "RUS12"
~2
_Actor Say "RUS9"
~2
_Actor SetMimic "Ironic"
_Actor Say "RUS20"
~3
_Actor SetMimic "Angry"
_Actor Say "RUS14"
~5
; Remove the camera
CutRSC ["Default","Plain
Down",100]
_Camera CameraEffect
["Terminate","Back"]
CamDestroy
_Camera
exit
As you can
see the CutObj keyword looks exactly like the CutRsc keyword but
will enable you to set the screen to look as a TV. You can’t use the “Default”
command to CutObj though you will have to use CutRSC to bring the screen back
to normal.
You might
wonder why I increment the z value for the camera with 1.25. This is because we
will use this script using a static camera object as the camera, 1.25 is the
approximate height of that object.
The keyword
SetMimic is really useful when creating cut scenes because it will allow
us to set different face expressions for an unit. Here I use the “angry” and
“ironic” command which will of course set the expression to angry and ironic.
Say is
a little harder to use though. There is no such keyword as Said or SayDone. So we
can’t time different speeches with the @ command. You will simply have to tweak
until you get a good pause between the sounds. When you use say you will pass a
string containing the
Identifier
for the string. I use pre-made sounds which I looked up in the stringtable.csv
file. If you scroll down a little in Excel or whatever program you are using
for viewing the file you should see something like:
STR_CFG_SOUNDS_RUS5,Russian -
Damn,Russe - Bon sang,Russo - Dannazione,Ruso: ¡Maldita sea!,Russisch - erdammt,Russian - Damn
STR_CFG_SOUNDS_RUS5 is the identifier for the sound.
The things after is only remarks for helping you to remember what the sound
will sound like. You should not use the whole identifier when referring to the
sound file. If you take a look at my script I only included the last little snippet
RUS5 or whatever number I used. You can also create your own sound
files. However I will not take up this subject here because it really doesn’t
have anything to do with scripting and second I don’t really know how. The good
thing about Say is that the unit which will speak will automatically move his
lips!
Okay, now
lets test our script. Start by creating your player. Next create a “Tent Open”
object somewhere on some flat ground.
Add a “Camera” object within the tent, name it “Camera”. Add a Russian officer
somewhere in the tent and make the Officer face the camera and the camera face
him. In his init field of the officer add the line.
[Camera, this] exec “cutscene.sqs”
Now press
the preview button and watch the little stupid movie. You may have to tweak
quite a bit before getting a good looking movie. As you can see you can create
some quite good cut scenes with the help of scripting. Try making this in the
regular editor! That’s about all I had to say about cut scene scripting.
Examples
This chapter is full of different scripting examples, each teaching you
something new. This chapter was also written to give you a hint of when to use
scripts and how to implement them. At the end of this chapter there will be a
couple of scripting challenges for you to write. Happy scripting!
The scripts
you will encounter during this chapter will come in different versions. We
begin by writing the first version which we name <name>1.sqs. We discuss
the script and try finding something we could improve. When we do, we write
another script and name that one to <name>2.sqs until we get to the last
version which will be named <name>.sqs. This way you will learn how to
improve your scripts, what is a good habit and what is not. You will also get
more time together with the examples which is a good thing.
Inzone.sqs
The first
script we will study is the Inzone.sqs the script will check weather a
specific unit is within a defined zone. As soon as the unit is, the script will
run another script using vector passing. When using the script you must create
2 objects, one being the unit to keep track of and the other being the centre
of the zone.
Inzone1.sqs
_Object = _this select 0
_Centre = _this select 1
_radius = _this select 2
_script = _this select 3
_vektor = _this select 4
#Update
? (_Object Distance _Centre) <= _radius :
_vektor exec _script; exit
~2
goto
"Update"
This is our
first version of the inzone.sqs. This version uses a new keyword, Distance.
This keyword will return the distance in meters of two objects. We use this to
check weather the _Object is within a certain amount of meters from the center
object. If it is, the passed script will be executed. Their shouldn’t be any
problem understanding this script so we will begin improving immediately. We
start off by asking ourselves one thing.
- What does the script currently
decide itself?
The answer
to this question my friend lies in the 9th line of the script. ~2
is the only constant in this script. The script will always check every 2
seconds weather the passed object is within the zone. This can be quite
annoying if the user only needs to do the check every 10th seconds
and is forced to call the script 5 times per 10 seconds instead of one. This
can really slow down the performance. What to do? Well this is easily fixed! We
simply add another argument to the script which will be the updating frequency.
Inzone2.sqs will show you the way.
Inzone2.sqs
_Object = _this select 0
_Centre = _this select 1
_radius = _this select 2
_freq = _this select 3
_script = _this select 4
_vektor = _this select 5
#Update
? (_Object Distance _Centre) <= _radius :
_vektor exec _script; exit
~_freq
goto
"Update"
Here you
see that we fetch another value, the _freq variable will hold the passed delay
between the check and use it in conjunction with the ~ operator. There is still
a problem with this script though. The scrip will terminate itself when the
condition is met. This could cause a problem if the user wanted use this script
to add points for the player or something else like that. Lets fix this by
adding yet another argument.
Inzone3.sqs
_Object = _this select 0
_Centre = _this select 1
_radius = _this select 2
_freq = _this select 3
_script = _this select 4
_vektor = _this select 5
_life = _this select 6
#Update
~_freq
? (_Object Distance _Centre) <= _radius :
goto "InZone"
goto "Update"
#InZone
? (_life == "LOOP") : _vektor exec
_script; goto "Update"
? (_life == "ONCE") : _vektor exec
_script
exit
Okay, this
script is a little longer but a little better. First of all we created another
string which we named _life. This is later on used to determine weather
or not to exit the script. The #InZone label will check if the user passed
“ONCE” or “LOOP”. If the user didn’t pass any of these the script will exit
without even calling the other script. This script will work, but it will be a
little slow and a little less flexible then what we want. Lets rewrite it the
right way! The script you will see next is actually the finished version and is
therefore named InZone.sqs
Inzone.sqs
_Object = _this select 0
_Centre = _this select 1
_radius = _this select 2
_freq = _this select 3
_script = _this select 4
_vektor = _this select 5
_life = _this select 6
#Update
~_freq
? (_Object Distance _Centre) <= _radius :
goto "InZone"
goto "Update"
#InZone
_vektor exec _script
? (_life == "LOOP") : goto
"Update"
exit
Hey, wait a
little. You didn’t change anything except those last lines! Yes, but take a
deep look and you will notice that I accomplished two things by just this
slight change. First of all I made it to work even if the user didn’t pass
“ONCE”. The other script will be executed and the script will be terminated. I
also took out an additionally check which will speed up the script a little.
Remember to read your scripts careful, you might find something hidden
somewhere.
Lets test
our script shall we? Create a player and a Flagpole. In the init field of the
flagpole type in the following.
[Player, this, 100, 1, “print.sqs”, [“In Zone!”], “LOOP”] exec
“inzone.sqs”
The object
named Player is a predefined object that points to the player. It is a
global one so you can use Player anywhere! No more passing the player value!
Place the player about 120 meters from the flagpole (Use a trigger to check the
range) and press preview.
Barrage.sqs
The next
script we will take a close look upon will be really fun to make. The script
will create an artillery barrage. To use the script the user must create a
marker, designating where to fire, an object used to create the explosion. Here
is the first version of the script.
Barrage1.sqs
_Actor = _this select 0
_Centre = _this select 1
_oldx = GetPos _Actor select 0
_oldy = GetPos _Actor select 1
_oldz = GetPos _Actor select 2
#Update
_cx = GetMarkerPos _Centre select 0
_cy = GetMarkerPos _Centre select 1
_cz = GetMarkerPos _Centre select 2
_cx = _cx + Random(200) - 100
_cy = _cy + Random(200) - 100
_Actor SetPos [_cx,_cy,_cz]
_Actor SetDammage 1
~0.01
_Actor SetPos [_oldx,_oldy,_oldz]
_Actor SetDammage 0
~1
goto
"Update"
This will
create a nice artillery fire over a 200 m2 area (Max 100 meters from
the centre). The script needs a little polish up though. First of all the
script is way to slow, I don’t even know if this script would be run-able in a well
populated mission. Before I go on and fix this though we should take a quick
look at the new keyword I use. GetMarkerPos works exactly like the
GetPos, except it will use markers instead of objects. We could not use markers
in the last script because the Distance keyword only works with objects
and I don’t know how to convert these two. GetMarkerPos will simply return a
vector containing the x,y and z coordinates for the marker. Now when you know
what that keyword was lets speed up the code a little bit. Ooops, almost
forgot, hehe. You might wonder what Random does. Well random is a great
function that will return a random number ranging from 1 to whatever you like.
Here I use 200, so the number returned would be 1 – 200. I also subtract 100 so
the range now goes from. –99 to 100. Hmm, that makes a 99 * 100 “square” which
I must confess isn’t 200 m2 but it is close enough.
Barrage2.sqs
_Actor = _this select 0
_Centre = _this select 1
_ActorPos = GetPos _Actor
_oldx = _ActorPos select 0
_oldy = _ActorPos select 1
_oldz = _ActorPos select 2
_CentrePos = GetMarkerPos _Centre
_cx = _CentrePos select 0
_cy = _CentrePos select 1
#Update
_Actor SetPos [_cx + Random(200) - 100,_cy +
Random(200) - 100, 0]
_Actor SetDammage 1
~0.01
_Actor SetPos [_oldx,_oldy,_oldz]
_Actor SetDammage 0
~1
goto
"Update"
Okay, study
this closely. First of all I deleted the _cz variable since we will only
be working on the ground anyway. This will remove 1 function call. I also
placed all the GetMarkerPos statements above the loop since we only need to get
the centre once. This will really speed up things. Be sure you don’t change the
_cx and _cy variables in the loop. We also created two new
objects called _ActorPos and _CentrePos, they don’t really speed
up things much but a little, and a little can sometimes be enough.
Do you know
the big problem with our script? If you don try asking yourself the question I
mentioned earlier. You will probably come to the conclusion that the script
will force the user to create an unlimited barrage, firing every 1.01 seconds
and always within a 200 m2 area. Lets change this!
Barrage.sqs
_Actor = _this select
0
_Centre = _this
select 1
_area = _this select
2
_freq = _this select
3
_rounds = _this
select 4
_ActorPos = GetPos
_Actor
_oldx = _ActorPos
select 0
_oldy = _ActorPos
select 1
_oldz = _ActorPos
select 2
_CentrePos =
GetMarkerPos _Centre
_cx = _CentrePos
select 0
_cy = _CentrePos
select 1
_areaX2 = _area * 2
#Update
_rounds = _rounds - 1
_Actor SetPos [_cx +
Random(_areaX2) - _area,_cy + Random(_areaX2) - _area, 0]
_Actor SetDammage 1
~0.01
_Actor SetPos
[_oldx,_oldy,_oldz]
_Actor SetDammage 0
~_freq
? (_rounds > 0) :
goto "Update"
exit
This is the
final version of the barrage.sqs. This script uses the variable named _freq
to control the delay between each round. It uses _rounds to keep track
of how many shells to fire and how many that is left. If you study the line
which jumps to Update you will see that I check if rounds is greater then 0, if
it is continue to bombard else exit the script. You will also notice that I
added a variable named _area in order to specify the maximum divergence
from the centre each round could get. You might also notice that I choose not
to multiply _area with 2 each time I fire a round, instead I created another
local variable named _areaX2 which is only calculated once. This will
speed up things a little. In these kinds of scripts speed is almost everything.
That’s it! Now lets test our barrage, shall we?
Start off
by creating an empty BMP or something which
we will use as an detonator. Name it explo. (You just create your player first)
Continue by creating a marker somewhere and name it Here. In the players init
field type something like this.
[explo, “here”, 50, 0.5, 100] exec “barrage.sqs”
This will
set up an artillery barrage with 100 rounds which will fire 2 rounds each
second. The bombardment will stay within a good 50 metres from the marker. You
should place the detonator vehicle somewhere where the player won’t see it. On
some computers a BMP might be a little to big and complex to use, you might get
a slight glimpse at it when it detonates. If you experience this please use a
smaller detonator such as a M2 machine gun. I tested this script a little
longer then the other ones (wonder why? Hehe!) and I found a funny but strange
thing. When you drive with a tank trough the barrage it will not take any
damage from big vehicles such as BMP, T80, M1A1 or T60 instead it will suffer
damage from small static objects such as M2 or M2 (east) this is really strange,
but it is a good thing because M2’s will not stay visible as much as a BMP, it
is so small. It will also create the same size of explosion so that won’t be a
problem either. Just a thing to keep in mind.
Eject.sqs
Now we will
take a look at a script that will force units to eject. The first version of
the script can be found here.
Eject1.sqs
_Egrp = _this select 0
_Object = _this select 1
_GrpVektor = Units _Egrp
_numEl = count _GrpVektor
_i = 0
#Update
(_GrpVektor select _i)
action["EJECT",_Object]; UnassignVehicle (_GrpVektor select _i)
~1
_i = _i + 1
? (_i < _numEl) : goto "Update"
exit
The first
keyword we will take a look at is the Units keyword. It will take one
parameter and return a vector. The returned vector will contain all the objects
within the group we passed. Here I give all the objects within the group named _Egrp
to a vector called _GrpVektor. The other new keyword is the action
keyword that will take x parameters. The number of parameters you should pass
depends on the command you which to perform. In this case we perform the
command named “EJECT” which will make an object eject from a vehicle. When we
use eject is also require us to pass another value, the name of the vehicle.
This is why we must pass the name of the vehicle to this script.
The update
loop will simply go through each of the objects in the _GrpVektor and make it
eject. The loop will stop when all units have been ejected.
Is there a
way to improve this already tight script? Yes, sometimes you don’t want all the
objects in the group to eject, perhaps the player. So we will make up three
different constant the user must pass to the script to work.
“PLAYER” (only eject the player)
“AI” (only eject the computer
controlled players)
“ALL” (Eject everybody)
eject2.sqs
will show how to implement this.
eject2.sqs
_Egrp = _this select 0
_Object = _this select 1
_Who = _this select 2
_GrpVektor = Units _Egrp
_numEl = count _GrpVektor
_i = 0
? (_Who == "PLAYER") : Player
action["EJECT",_Object]; UnassignVehicle Player; exit
#Update
? (_Who == "AI") &&
((_GrpVektor select _i) == Player) : _i = _i + 1
? (_i == _numEl) : exit
(_GrpVektor select _i)
action["EJECT",_Object]; UnassignVehicle (_GrpVektor select _i)
_i = _i + 1
~1
? (_i < _numEl) : goto "Update"
exit
As you can
see we have added a new string named _Who, if the script detects that
_Who contains “PLAYER” it will only execute the first condition line. If the
script conatins “AI” and the current unit who is being ejected is the player
then the script won’t eject him. Instead it will increase the counter and check
weather or not the counter is still valid.
There is
one little problem left, the user can’t really decide the interval between each
drop. There is always 1 second between the drops. The last version of the script
listed below will show you have to do this.
Eject.sqs
_Egrp = _this select 0
_Object = _this select 1
_freq = _this select 2
_Who = _this select 3
_GrpVektor = Units _Egrp
_numEl = count _GrpVektor
_i = 0
? (_Who == "PLAYER") : Player
action["EJECT",_Object]; UnassignVehicle Player; exit
#Update
? (_Who == "AI") &&
((_GrpVektor select _i) == Player) : _i = _i + 1
? (_i == _numEl) : exit
(_GrpVektor select _i)
action["EJECT",_Object]; UnassignVehicle (_GrpVektor select _i)
_i = _i + 1
~_freq
? (_i < _numEl) : goto "Update"
exit
The only
real difference is the new variable named _freq, this variable will keep
track of the wanted delay between each drop.
It is now
time to test the finished script. Start by creating a group. Make one of the
group members a player and name the group to grp. Create a chopper and name
that one to Heli. Select the Heli and create a move waypoint somewhere on the
map. In the init field of the chopper type.
This
FlyInHeight 100
This will
simply make the chopper to fly to the waypoint at a altitude of 100 metres.
Create a trigger about 50x50 and place it somewhere in the path of the chopper.
In the activation field type in the text below. The trigger should have a WEST
or ANYBODY present condition.
[grp, Heli, 0.5, “AI”] exec “eject.sqs”
Now play
the mission.
There is
one important lesson to learn from this script (I learned it while writing it)
If you look at eject2.sqs and eject.sqs you will see that I abuse
the code a little by checking at the wrong place. Take a look at this little
snippet and you will see what I mean.
? (_Who == "AI")
&& ((_GrpVektor select _i) == Player) : _i = _i + 1
? (_i == _numEl) : exit
What we
would like to do is the following.
? (_Who == "AI")
&& ((_GrpVektor select _i) == Player) : _i = _i + 1; ? (_i == _numEl) :
exit
This way
the check would only be applied if the last statement was true, however on my
machine I would get an error message telling me I used a Reserved Variable.
I made the conclusion that the script can’t handle multiple conditions in one
line. This is really annoying, we could had written the script in another way
though to get around this problem, but an eject script doesn’t have to be that
fast really. Keep this in mind when making your own scripts though.
Minelay.sqs
The
next script we will take a look at is a script I named minelay.sqs it
will take four arguments, the object who will lay the mines, how many mines to
lay and the max and minimum distance from his current position he will lay the
mines. It is up to the user to make sure the object is equipped with mines
before calling this script. The first version of the script is listed below.
Minelay.sqs
_Object = _this select 0
_numMines = _this select 1
_minDist = _this select 2
_maxDist = _this select 3
; Save the current coordinates
_ObjPos = GetPos _Object
_ox = _ObjPos select 0
_oy = _ObjPos select 1
_maxDistX2 = _maxDist * 2
#Update
; Get some random positions
_nx = _ox + Random(_maxDistX2) -
_minDist
_ny = _oy + Random(_maxDistX2) -
_minDist
; Move him
_Object move [_nx, _ny, 0]
; Wait until the object is in
position
@UnitReady _Object
; Lay a mine
_Object fire ["Put",
"Mine"]
_numMines = _numMines - 1
? (_numMines > 0) : goto
"Update"
exit
Okay,
the script will start by getting the positions the unit had when the script got
executed, we then use these coordinates as the centre. The script will then
generate some random locations within a certain range area using the _minDist
and _maxDist variables. The new keyword we see here is the UnitReady
keyword which will return true or false depending on the objects current
status. If he is done with the last order, in this case the move command it
will return true. Since we use the @ keyword the script will be halted until he
reaches his designated position. Once there he will lay a mine using the fire
keyword. Fire works in a bit like the action keyword except it will only takes
strings containing firing constants. In this case we pass the strings “Put” and
“Mine”. The first string will contain the fire mode, since we often put down a
mine we use “Put” here. The second one will contain the weapon to fire.
If
you would like to test the script you will have to do the following. Create
your player in a place you will see all the action. Create an Engineer named
MineLayer, create a flagpole about 30 metres away from the minelayer. Select
the minelayer and create a move waypoint where the flagpole is located. We only
added the flagpole so you would be able to see weather the script only lay
mines within a certain range. The waypoint we is about to create should have
the following commands in the activation field.
[MineLayer, 3, 10, 20] exec “minelay.sqs”
Now
run the script and watch how the engineer put down 3 mines.
Laymine.sqs
This
script is another version of the minelay.sqs script, instead of placing
down mines at some random locations within a specified area though, this script
will let us pinpoint the locations of the mines and put them exactly where we
want them. The script will only take two arguments. The object to lay the mines
and a vector containing the locations for the mines. The script will use
markers for the locations. As the last script this script will only come in the
finished version sine I couldn’t find another way to write it. Here it is.
Laymine.sqs
_Object = _this select 0
_vektor = _this select 1
; Get the number of waypoints
_index = 0
_numEl = count _vektor
#Update
; Order the unit to move
_Object move GetMarkerPos (_vektor
select _index)
; Has the unit reached the marker?
@UnitReady _Object
; Lay a mine!
_Object Fire
["Put","Mine"]
_index = _index + 1
? (_index < _numEl) : goto
"Update"
exit
This
is a quite powerful and smart script. It will automatically calculate the
number of mines to put by using the count keyword. Then it will enter a
loop and increase the _index variable which is used to pick out the
waypoints. The script should be self explanatory and I don’t think I need to
tell you that much more.
We
will now test the script by creating our player and an engineer. In the init
field of the engineer type in the following.
[this, [“First”, “Second”, “Third”]] exec “laymine.sqs”
Before
you go ahead and run the script, create three markers and name them “First”,
“Second” and “Third”. Don’t place them to close to each other or it will make
the script bug. 3-5 Metres should be good. Now run the script and watch how the
engineer will put down the mines one after another.
Scripting Challenges
* Create a
script that will execute another script, name it stayclose.sqs. When you call the script it should look like
this.
[object1,object2, x, freq, [vector], “scriptname”] exec “stayclose.sqs”
Where
object1 should be the unit that must stay close to the unit (object2) and x the
distance in metres he must hold. Freq will be the desired update frequency and
vector will hold the arguments for the script to run which.
Hint: Use the Distance keyword
together with a loop. The loop should detect if the first object is not within
the required distance.
*
Create a script that will be named flakgun.sqs, the script should work
in the exact same way as the barrage.sqs, instead of firing on the
ground though the script should fire within a specific cube in the air. This
will simulate AA guns. When you call the script it should take the following
parameters.
[Object, “Centre”, Coverage, minHeight, maxHeight, Rounds, Delay] exec
“flakgun.sqs”
Here
Object is the detonator, Centre is the marker name where to fire. Coverage is
the maximum metres from the centre a shell can land. MinHeight and maxHeight
will tell the which height borders the barrage should stay within. Rounds is
the total number of shells to fire and Delay the time in seconds between each
round.
Hint: When changing the height of
the barrage simply add a z variable and use that instead of the 0 constant we
used in barrage. When defining the z variable you must use the Random keyword
and generate a random value that will never be great then height maxHeight and
never lower then minHeight.
Email: goldsword@swipnet.se